Elevate Your Deviled Eggs: Expert Boiling, Peeling, and Filling Tips for the Perfect Party Appetizer
Deviled eggs are more than just a party staple; they're a culinary comfort, a nostalgic bite that consistently delights crowds at game day gatherings, festive holidays, and casual potlucks alike. While seemingly simple, the journey from a raw egg to a perfectly formed, irresistibly creamy deviled egg involves a few expert secrets. We're here to unlock them for you, ensuring your deviled eggs are not just good, but truly unforgettable. From the precise science of boiling to the delicate art of peeling and crafting the smoothest filling, prepare to master every aspect of this beloved classic.The Foundation: Mastering the Hard-Boil for Flawless Deviled Eggs
The secret to truly great deviled eggs begins long before you even consider the filling: it lies in perfectly cooked hard-boiled eggs. Unlike their jammy counterparts, deviled eggs demand a yolk that is firm, pale yellow, and completely solid, providing the ideal texture for mashing into a smooth, creamy base. Achieving this consistency without overcooking the whites (leading to a rubbery texture) or undercooking the yolks (making them unsuitable for filling) is a precise science. Here’s our tried-and-tested method for perfectly cooked eggs every time:- Start with Boiling Water: Bring a pot of water to a rolling boil. The size of your pot matters – ensure there's enough room for the eggs to move without overcrowding, which can lead to uneven cooking or cracking.
- Remove from Heat: Once boiling, take the pot off the heat source. This crucial step prevents the eggs from being violently jostled, reducing the risk of cracking.
- Gently Lower Cold Eggs: Using a slotted spoon, carefully lower your cold eggs into the hot water. Starting with cold eggs and adding them to hot water allows for more even cooking and helps prevent the dreaded green ring around the yolk, a sign of overcooking.
- Cover and Stand: Immediately cover the pan with a tight-fitting lid. Let the eggs stand in the hot water for precisely 12 minutes. The residual heat will gently cook the eggs to firm perfection.
- The Ice Bath is Non-Negotiable: As soon as the 12 minutes are up, lift the eggs out of the hot water and immediately transfer them to a bowl of ice water. This "shocking" process is vital: it halts the cooking instantly, preventing the yolks from overcooking and becoming chalky, and ensures the egg whites remain tender, not rubbery. Allow them to cool in the ice bath for 2 to 3 minutes before peeling.
The Art of Effortless Peeling
Few kitchen tasks are as frustrating as struggling to peel a hard-boiled egg, only to have half the white come away with the shell. But with the right technique, you can minimize shell adhesion and achieve beautifully smooth whites, ready to cradle your creamy filling. Here's how to peel eggs like a pro:- Utilize the Ice Bath: The ice water bath isn't just for stopping the cooking; it also helps the egg whites contract, creating a tiny gap between the egg and the shell's membrane, making them easier to peel.
- Gentle Cracking: Once cooled, gently tap the wide end of the egg on a hard surface, like your countertop, until it cracks.
- Roll with Light Pressure: Next, gently roll the egg across the surface with light, even pressure from your palm. This helps to create a network of fine cracks all over the shell, loosening it from the egg white.
- Peel Under Water (Optional but Recommended): For stubborn pieces, or simply to make the process smoother, peel the egg under cool running water. The water helps to wash away tiny shell fragments and can help dislodge any pieces that are still clinging to the egg white. Alternatively, you can dip the peeled egg back into the ice water for a quick rinse.
Crafting the Silky-Smooth Filling
Once you have your perfectly cooked and peeled egg whites, it's time for the magic: transforming those firm yolks into a delectable, creamy filling. The goal is a velvety-smooth mixture that holds its shape beautifully while melting in your mouth. Follow these steps for a filling that will impress:- Separate Whites and Yolks: Carefully cut each hard-boiled egg in half. You can cut them lengthwise or crosswise – it’s a matter of preference. Gently scoop out the firm yolks into a medium-sized bowl, being careful not to tear the delicate whites.
- Mash the Yolks First: This is a critical step for achieving smoothness. Before adding any other ingredients, use a fork to thoroughly mash the yolks until they are a fine, crumbly powder with no large lumps. This prevents over-mixing later, which can incorporate too much air and result in a less dense, less creamy texture.
- Incorporate Your Staples: Now, add your essential filling ingredients:
- Mayonnaise: The cornerstone of creaminess, mayo binds everything together and provides richness.
- Sugar: A touch of white sugar (usually a teaspoon for six eggs) offers a subtle sweetness that balances the tang and mustard.
- White Vinegar: Just a teaspoon of white vinegar cuts through the richness and adds a bright, acidic counterpoint, awakening all the flavors.
- Mustard: Store-bought prepared yellow mustard or homemade versions provide that classic, pungent kick.
- Mix Thoughtfully, Don't Over-Mix: Using your fork or a rubber spatula, gently combine all the ingredients until just smooth and uniformly creamy. Over-mixing can incorporate too much air, leading to a lighter, less luxurious texture.
- Consider Texture Additions: For an extra layer of complexity, consider finely diced onion and celery, as noted in some classic recipes. These additions provide a delightful crunch and subtle aromatic notes that complement the creamy filling.
- Taste and Adjust: Always taste your filling! Adjust seasonings as needed. You might want a pinch more salt, a dash more mustard, or an extra sprinkle of sugar or vinegar to hit your perfect balance.
Elevating Your Deviled Eggs: Beyond the Basics
While the classic deviled egg recipe is undeniably delicious, there's a world of creativity waiting to be explored. Once you've mastered the foundational techniques, you can begin to personalize your deviled eggs, transforming them from a beloved standard into a signature dish.Creative Flavor Variations
Think beyond the traditional and infuse your deviled eggs with exciting new profiles:
- Spicy Kick: Mix in a dash of hot sauce (like Sriracha or Tabasco), finely minced jalapeños, or a pinch of cayenne pepper or smoked paprika for a smoky heat.
- Herbal Freshness: Incorporate finely chopped fresh herbs such as dill, chives, parsley, or tarragon for bright, aromatic notes.
- Savory Enhancements: Add crispy bacon bits, a sprinkle of curry powder, a hint of Worcestershire sauce, or even a touch of finely grated Parmesan cheese for umami depth.
- Tangy Twists: Experiment with different types of mustard (Dijon, stone-ground), a spoonful of sweet pickle relish, or finely chopped capers for an extra layer of piquant flavor.
- Unexpected Combinations: Consider adding a small amount of avocado for a creamier, richer texture and a vibrant color, or a sprinkle of everything bagel seasoning for a unique twist.
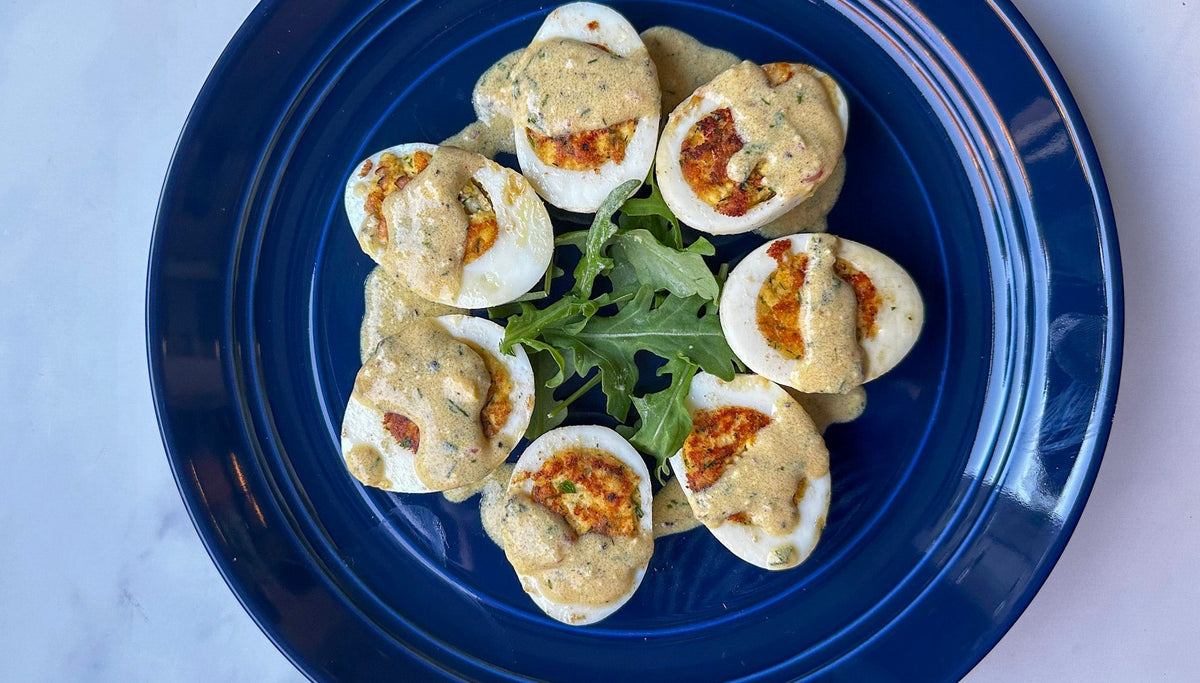
Presentation Prowess: Filling and Garnishing
The visual appeal of deviled eggs is half the battle. While a spooned filling is perfectly acceptable, a little extra effort can make them truly shine.
- Piping for Perfection: For an elegant, professional look, transfer your deviled egg filling into a piping bag fitted with a star tip (or even just a snipped corner of a Ziploc bag). Pipe the filling neatly into each egg white half, creating beautiful swirls.
- Garnish with Flair: The garnish is your final flourish. A dusting of paprika (sweet, smoked, or even hot) is classic. Fresh herbs like a sprig of dill or a sprinkle of chives add color and freshness. Other options include tiny bacon bits, a small olive slice, a caper, a microgreen, or even a tiny dab of caviar for a luxurious touch.
Make-Ahead and Storage Tips
Deviled eggs are best enjoyed fresh, but you can prepare components in advance:
- Separate Components: Hard-boil and peel your eggs up to two days in advance. Store the peeled whites in an airtight container in the refrigerator. Prepare the filling mixture and store it separately in an airtight container in the fridge.
- Assemble Just Before Serving: For optimal freshness and presentation, fill the egg whites no more than a few hours before serving. This prevents the whites from drying out and the filling from becoming watery.
- Refrigerate Promptly: Deviled eggs should not be left at room temperature for more than two hours. Store any leftovers in an airtight container in the refrigerator for up to 2-3 days.
