Deviled eggs are more than just a party appetizer; they're a culinary cornerstone, a dish that evokes nostalgia and delight with every creamy bite. From casual game days and potlucks to elegant holiday gatherings, these savory treats consistently disappear first from the platter. While seemingly simple, transforming humble eggs into exceptional deviled eggs involves a nuanced process, particularly when it comes to the crucial first steps: perfect boiling and expert peeling. This guide will walk you through the secrets to mastering every aspect, ensuring your deviled eggs are not just good, but truly great.
The Foundation: Achieving Perfectly Boiled Eggs for Deviled Eggs
The journey to an outstanding deviled egg begins long before you even think about the filling. It starts with the eggs themselves and how they are cooked. The goal here is a firm, pale yellow yolk, completely solid and ready to be mashed into a velvety mixture. Forget jammy or soft-boiled yolks; while delicious in other contexts, they simply won't yield the desired texture for deviled eggs.
The Boiled Egg Science: Why Firm Yolks Matter
The firmness of the yolk is non-negotiable for deviled eggs. A solid yolk provides the structural integrity needed for a smooth, homogenous filling, preventing a runny or crumbly consistency. This is where precision in cooking time becomes paramount. Overcooked eggs can become rubbery with a greenish ring around the yolk, while undercooked ones will leave you with a filling that lacks body.
The Classic Boiling Method: Precision for Perfection
One of the most reliable methods for consistently perfect hard-cooked eggs involves a specific approach to temperature control. Here’s how to execute it flawlessly:
- Bring to a Rolling Boil: Start by bringing a pot of water to a vigorous, rolling boil. The size of your pot matters; ensure there’s enough room for the eggs to be submerged without overcrowding, which can lead to uneven cooking.
- Remove from Heat: Once boiling, immediately remove the pot from the heat. This step is crucial for preventing the eggs from rattling around and potentially cracking, while also ensuring a gentle, even cook.
- Gently Lower Eggs: Using a slotted spoon, carefully lower your cold eggs into the hot water. The temperature shock helps prevent shells from sticking later.
- Cover and Stand: Place a lid on the pot and let the eggs stand in the hot water for exactly 12 minutes. This precise timing allows the residual heat to cook the yolks through to that ideal firm, pale yellow state without overdoing the whites.
- The Ice Bath Intervention: As soon as the 12 minutes are up, lift the eggs out and immediately transfer them to a large bowl of ice water. This "shocking" process serves two vital purposes: it halts the cooking process instantly, preventing rubbery whites and green yolks, and it helps the egg whites contract, making the shells significantly easier to peel. Allow them to cool for 2 to 3 minutes in the ice bath before proceeding.
For more detailed insights on getting this step just right, refer to our article on Elevate Your Deviled Eggs: Expert Boiling, Peeling, and Filling Tips.
Steaming: An Alternative Path to Perfection
While boiling is classic, steaming eggs is another excellent method, often lauded by chefs for producing eggs that are remarkably easy to peel. The principle is similar to boiling but uses steam heat:
- Setup the Steamer: Pour about 1 inch of water into a shallow pot and bring it to a simmer. Place a steamer basket inside, ensuring the water level is below the basket.
- Arrange Eggs: Carefully arrange your large eggs in a single, even layer in the steamer basket.
- Steam to Perfection: Cover the pot and steam over low to medium-low heat for 12 to 15 minutes. The exact time may vary slightly based on your stove and egg size, so consider 12 minutes for firm, and up to 15 for very firm.
- Ice Bath, Again: Just like with boiling, immediately transfer the steamed eggs to an ice bath for a few minutes to stop the cooking and prepare them for peeling.
Peeling Perfection: Unlocking Shells with Ease
The moment of truth for any hard-cooked egg is the peel. A clean peel means beautiful, intact egg whites, crucial for the aesthetic appeal of your deviled eggs. A frustrating peel can lead to jagged whites and wasted effort. Fortunately, a few simple tricks can make all the difference.
The Ice Bath Imperative: Your Peeling Ally
We've already emphasized the ice bath for stopping the cooking, but its role in easy peeling cannot be overstated. The rapid cooling causes the egg white to slightly contract, pulling away from the shell membrane. This separation is key to a smooth peel. Never skip this step!
Gentle Cracking Techniques: Less Force, More Finesse
Forget aggressive banging. The secret to a good peel lies in gentle, even pressure:
- Tap and Roll: Gently tap the wide end of the cooled egg on a counter until the shell cracks. Then, with light pressure, gently roll the egg across the surface of the counter to create a network of fine cracks all over the shell. This loosens the membrane beneath.
- Peel Under Water: For particularly stubborn eggs, try peeling them under a gentle stream of cold running water, or submerged in a bowl of cold water. The water helps to get under the membrane and wash away tiny shell fragments, making the process smoother and cleaner.
- Focus on the Air Pocket: Often, there's a small air pocket at the wider end of the egg. Start peeling from this point, as it's usually the easiest place to get a good grip under the membrane.
Pro Tip: While very fresh eggs are great for scrambling, eggs that are a few days to a week old tend to peel more easily for hard-cooking, as their membranes have had more time to loosen from the shell.
Crafting the Creamy Filling: The Heart of Your Deviled Eggs
With perfectly cooked and peeled egg whites ready, it’s time to focus on the star attraction: the creamy, flavorful filling. This is where your deviled eggs truly come to life, offering a delightful balance of tang, sweetness, and savory notes.
Essential Ingredients & Ratios: The Classic Deviled Egg Blueprint
For 12 deviled egg halves (from 6 whole eggs), here are the core ingredients and their roles:
- Egg Yolks: The foundation of creaminess.
- Mayonnaise (approx. ¼ cup): Provides the luxurious, smooth texture and richness. Opt for a good quality full-fat mayonnaise for the best results.
- Prepared Mustard (1-2 teaspoons): Yellow mustard is classic, offering a tangy bite. Dijon can be used for a sharper, more sophisticated flavor.
- White Vinegar (1 teaspoon): A splash of acidity is crucial to cut through the richness of the mayo and balance the flavors. It adds a zesty brightness.
- Granulated Sugar (½ - 1 teaspoon): A hint of sweetness might seem unconventional, but it beautifully rounds out the flavors, balancing the tang of the mustard and vinegar.
- Salt and Freshly Ground Black Pepper: To taste, enhancing all the other components.
For more simple yet effective recipes, check out Easy Deviled Eggs: Achieve Creamy Texture with Simple Ingredients & Pro Hacks.
The Art of Mashing and Mixing: Smoothness is Key
Achieving that coveted smooth, lump-free filling requires a methodical approach:
- Separate Whites and Yolks: Carefully slice your hard-cooked eggs in half, either lengthwise or crosswise (lengthwise often yields a prettier presentation). Gently scoop out the firm yolks into a medium bowl, leaving the whites intact as perfect little cups.
- Mash Yolks First: Before adding any other ingredients, use a fork to thoroughly mash the yolks until they are a fine, crumbly consistency. This ensures there are no large lumps, which can be difficult to break down once liquids are introduced.
- Incorporate Wet Ingredients: Add the mayonnaise, mustard, vinegar, and sugar to the mashed yolks. Mix well with the fork or a spatula until everything is thoroughly combined and smooth.
- Season and Taste: Add salt and pepper to taste. It’s vital to taste your filling and adjust the seasonings. You might want a little more mustard for tang, more sugar for sweetness, or a pinch more salt.
- Don't Over-mix: While you want a smooth filling, avoid over-mixing once all ingredients are combined. Just mix until smooth and well-incorporated; excessive mixing can sometimes lead to a slightly gummy texture.
Adding Texture & Flavor Beyond the Basics: Elevating Your Deviled Eggs
While the classic recipe is a crowd-pleaser, don't shy away from personalization. Elevate your deviled eggs with thoughtful additions:
- Finely Diced Vegetables: As suggested by classic recipes, finely diced onion and celery can add a delightful crunch and subtle savory notes. Ensure they are minced very small for a refined texture.
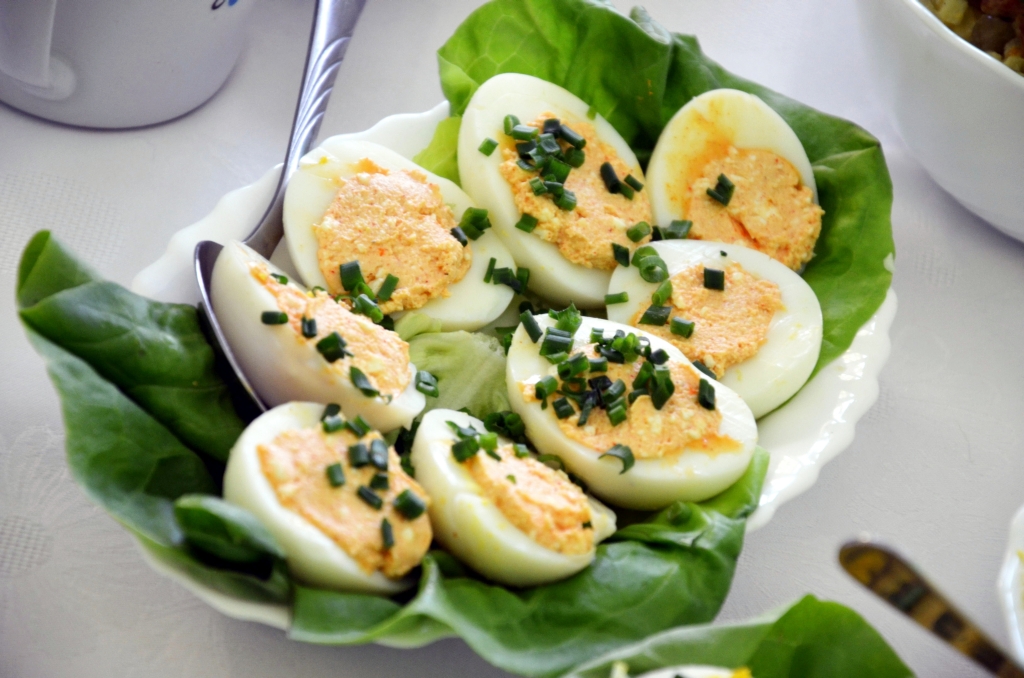
- Herbs: Fresh chives, dill, or parsley, finely chopped, lend a beautiful fresh flavor and vibrant color. Mix them into the filling or use them as a garnish.
- Heat: A dash of hot sauce (like Tabasco or Sriracha), a pinch of cayenne pepper, or even a hint of finely minced jalapeño can introduce a welcome kick.
- Relish: Sweet or dill pickle relish can add a fantastic tangy-sweet dimension and a bit of texture.
- Umami Boosters: A tiny bit of Worcestershire sauce or a pinch of smoked paprika can add depth.
Expert Tip for Ultra-Smooth Filling: For a truly restaurant-quality, silky-smooth filling, push your mashed and mixed yolk mixture through a fine-mesh sieve using a spatula before filling the egg whites. This extra step removes any tiny lumps and incorporates air, resulting in an incredibly light and airy texture.
Assembling and Serving Your Masterpiece
With your delectable filling prepared, the final steps involve assembling and presenting your deviled eggs beautifully.
Filling the Whites: Spoon or Pipe?
You have a couple of options for filling the egg white halves:
- Spoon Method: For a rustic, homestyle look, simply use two small spoons to mound the filling generously into each egg white half.
- Piping Bag Method: For a more elegant and professional presentation, transfer the filling to a piping bag fitted with a star tip (or even a Ziploc bag with a corner snipped off). Pipe decorative swirls into each egg white cup. This method is also great for portion control and speed.
Garnish and Presentation: The Finishing Touch
A simple garnish elevates the visual appeal of your deviled eggs:
- Classic Paprika: A light dusting of sweet paprika is the traditional and most common garnish, adding a touch of color and subtle flavor. Smoked paprika can add another layer of complexity.
- Fresh Herbs: A small sprig of fresh dill, a sprinkle of finely chopped chives, or a parsley leaf perched on top adds freshness and color.
- Crunchy Toppings: Crumbled cooked bacon, tiny fried shallots, or even a few capers can add textural contrast and a burst of flavor.
Storage and Make-Ahead Tips
Deviled eggs are best enjoyed fresh, but they can be made ahead. Store the egg white halves and the filling separately in airtight containers in the refrigerator. This prevents the whites from drying out and the filling from discoloring. Assemble them no more than an hour or two before serving for optimal freshness and presentation. They typically last for 2-3 days in the refrigerator when stored properly.
Conclusion
Mastering deviled eggs is a rewarding culinary endeavor that brings joy to any gathering. By understanding the science behind perfectly boiled eggs, employing careful peeling techniques, and crafting a balanced, creamy filling, you can consistently create a show-stopping appetizer. From the initial cold water plunge to the final sprinkle of paprika, each step contributes to the ultimate indulgence. So go ahead, put these secrets into practice, and watch your expertly prepared deviled eggs become the undisputed star of your next event!
